EC2 instances come with a spider web of charges — when you take a look at your bill, you’ll see there are hundreds of unique line items connected to your usage. In addition to the instance, you’re also billed for storage, data transfer, and networking associated with that instance. It’s important to fully understand those charges so you can find ways to optimize your costs.
Here’s a guide to AWS EC2 billing and the steps you can take to better manage your expenses for the major cost categories.
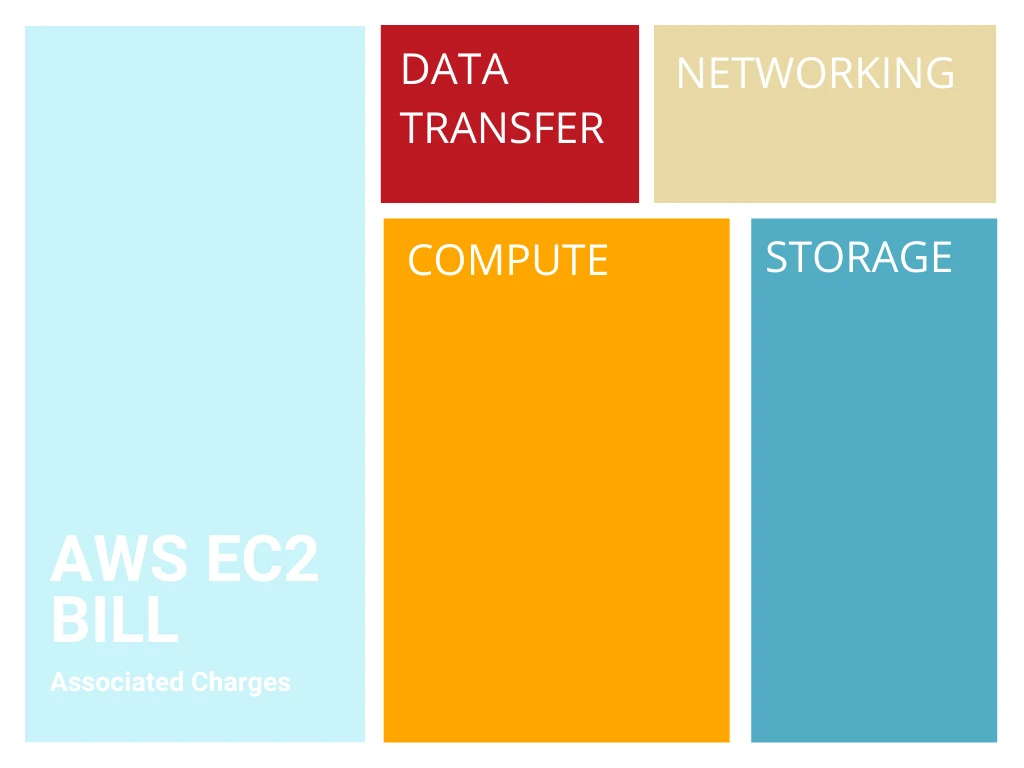
AWS EC2 Billing: 4 Components
Your EC2 bill items can be grouped into four major buckets. These are:
1. Compute
This is usually the biggest chunk of any EC2 bill and is billed in hours. There are different prices per hour depending on the type of instance you provision. In your EC2 bill, there’s one high-level charge for compute, then line items for different instance types. Spot instances are also included in this category.
2. Storage
The second-biggest category is usually storage. You are billed for total elastic block store (EBS) volumes attached to running instances. This is billed in gigabytes. Similar to compute, there are different price points for different types of EBS volumes. In your EC2 bill, storage is broken into these different categories and snapshots, which AWS considers as part of your storage.
3. Data transfer
AWS charges for all data transfer associated with your EC2 instances, but these charges are separate and not included in your EC2 bill. Still, it’s important to keep an eye on this, because data transfer is often an obscure area which requires expertise and careful navigation. So while your data charges appear in a separate bill, a huge chunk of this is associated with the EC2 instances you’re spinning.
4. Networking
This includes elastic load balancing (ELB), NAT Gateway, and elastic IP addresses. Similar to data transfer, ELB charges are not included in your EC2 bill. But NAT Gateway and elastic IP addresses are line items in your bill.
Overall, in terms of billing, data transfer and ELB are usually treated separately but they are still part of the charges for EC2 instances.
Ways To Optimize Your EC2 Costs
In each of the categories described, there are opportunities to optimize. Some areas are easier or harder to optimize than other areas.
For example, compute is usually the biggest proportion of the charge, but it’s also one of the harder ones to optimize. A best practice is to leverage Amazon’s native optimization tools as much as possible.
Optimizing Compute
There are three main ways to optimize compute: using reserved instances and savings plans, right-sizing, and switching to spot instances.
1. Using Reserved Instances
AWS reserved instances are billing discounts applied to on-demand instances when you commit to long-term usage of one or three years.
For example, you can lower the hourly rate of an on-demand instance by up to 62% when you make a standard reservation and pay upfront for a 3-year term. This is the easiest way to optimize compute because you can apply discounts at the click of a button. See this complete guide on reserved instances for more details.
2. Right-sizing
This involves checking your instance performance and usage patterns to identify idle resources you can turn off or over-provisioned resources you can downsize.
For example, if you’ve spun up a 2x large instance but usage doesn’t justify that volume, then it’s best to right-size. Amazon’s Compute Optimizer gives great recommendations for instances that can be right-sized. All you need to do is opt into the service in the AWS Compute Optimizer Console.
3. Using Spot Instances
Spot Instances are great for transient workloads and can save you up to 90% on the regular price of on-demand instances. But there are major caveats — this instance can be interrupted at any time and Amazon only issues a two-minute notification before the fact.
So, you should only use this for fault-tolerant workloads. This means you may need to re-architect your application to take full advantage. Read this detailed primer on spot instances to learn more about how best to deploy them.
Overall, the easiest vehicles to save on compute are reserved instances and savings plans. If you have enterprise support or have a Technical Account Manager (TAM), then you should leverage those options for even more customized savings.
Optimizing Storage
Amazon has different storage classes, and you can provision storage in the same way as compute. Optimized EBS volumes are usually more expensive than the general performance volumes.
While optimized volumes have great benefits when used correctly, the problem arises when teams use these volumes without any testing to justify the expenses. If you’re using any optimized volumes and your storage costs are shooting up, monitor the actual usage patterns and see if Amazon’s gp3 class can suffice for that workload.
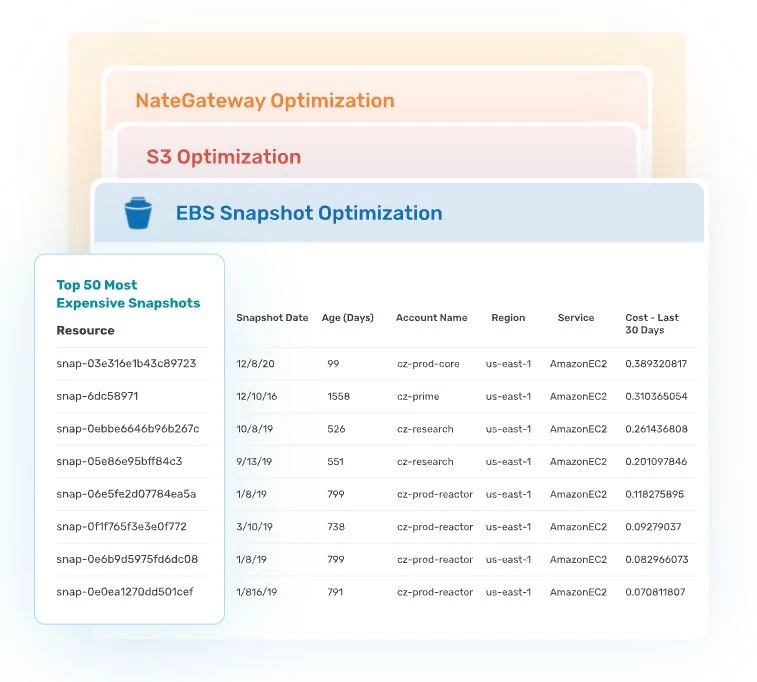
Snapshot costs can also be significant. If you’re still manually snapshotting, then leverage Amazon’s Data Lifecycle Manager (DLM), which allows you to control the number of snapshots Amazon stores for specific instances.
This is particularly important if you have a legacy application that manually snapshots, because you may have several aged snapshots.
Remember — unless you manually delete manual snapshots, they’ll continue to form part of your storage and you’ll be charged for them. Amazon considers any snapshots over 90 days to be aged, but you can define your snapshot lifecycles and the DLM will manage your snapshots accordingly.
Optimizing Data Transfer
There’s no easy way to optimize data transfer because it’s very architectural. But there are some ways to reduce your data transfer costs:
- Use Amazon CloudFront to cache and deliver content
- Limit outbound data transfer as much as possible
- Add “cost allocation tags” to your instances and load balancers
- Use a third-party cost intelligence platform like CloudZero to identify the most expensive data transfer areas
See this article for more strategies on how to optimize data transfer costs.
Optimizing Networking Costs
While there are different categories of networking charges and not all of them fall under EC2, the major cost contributor is NAT gateway, a service that allows two instances in a VPC to talk to resources on the internet.
You are charged based on the number of hours the gateways run, which is usually small, and you are also charged for the bytes of data transferred during that time.
These charges can add up to thousands or tens of thousands of dollars per month. Optimizing NAT gateway usually involves understanding what is driving the traffic through the gateway, then routing that traffic to other vehicles to avoid those charges.
It’s normal for every customer to have some amount of NAT gateway-associated charges, usually in the range of 1–3% of the total EC2 spend. But if your NAT gateway charges are greater than 5% or up to 10%, then there may be some business justification to take engineering time to figure out how to optimize those costs.
If you have a TAM, brainstorm with them about better ways to utilize your service endpoints or meshes.
Stay In Control Of Your EC2 Billing With CloudZero
While it’s great to look at your bill and see how much you’re spending on specific AWS services, it’s more important to understand what those figures mean in the context of your business.
For example, how much does it cost to deliver specific features or service certain customer segments? To make better business decisions, you need to understand how your line items connect to your bottom line.
CloudZero’s cost intelligence platform provides visibility into your cloud costs down to the resource level so you have a firm grasp of your COGS and unit costs. With CloudZero, you can click on a line item in your EC2 bill and see all the resources associated with that item. To see how CloudZero gives you complete visibility into your EC2 costs,  .
.
